This tutorial will explain how to replace the hard drive in your MacBook with a new one. This normally takes around 15 minutes once everything is ready. You’ll see, it’s really simple.
This post only applies to models of mid-2012 and before for the 13” and 15” versions and to the models of end-2011 and before for the 17” version. Models released after those dates should have an SSD by default, so the procedure simply isn’t relevant. If you don’t know the model of your MacBook, head over to this page to find out.
Prerequisites
- A MacBook (in this case, I used a Mid-2010 13-inch MacBook Pro)
- A 2.5-inch replacement drive (either a solid-state drive or a conventional hard disk, in my case I used a Samsung 860 EVO Basic 250GB SSD bought from Amazon. There’s also a 500 GB version and a 1 TB one. Crucial SSDs are also very well rated and have pretty interesting prices). Don’t hesitate to use the free 30-day Prime trial if you want to get your drive faster. Don’t forget to cancel it though ;-)
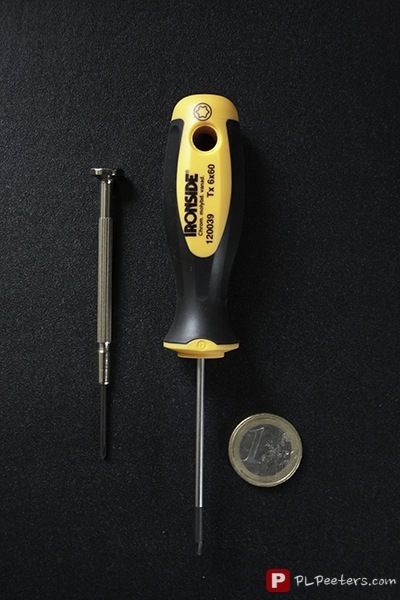
- A screwdriver with a Phillips #00 head (magnetic is better)
- Another screwdriver with a Torx T6 head (magnetic is still better)
- A backup of your important files
- An external hard drive to clone your internal drive to if you wish
- Optional: a macOS install disk (or USB thumb drive) if you choose not to go the Carbon Copy Cloner way (you can also just use Internet Recovery)
Warning
Before starting the tutorial, I have to inform you that I cannot be held responsible for any damage caused to your computer. Even if this tutorial has been written with extreme care and tested by myself (duh) and my girlfriend, something could always go wrong. However, if you follow the steps here, you should be just fine ;-)
Changing your hard drive does not void your warranty, given you don’t damage your MacBook in the process, of course… This also goes for upgrading your RAM.
Your MacBook Pro does not have any user-serviceable parts, except the hard drive and the memory. Mid-2010 13” MacBook Pro User Guide, p. 64
Before you start
Before you start, make sure you’re all set. The most important thing is to have a backup of your data. Besides that, you have two options:
- You can do a clean install, which will just require an Internet connection to access the Internet recovery to reinstall macOS (you could also use a macOS install DVD or thumb drive, but I’ve had a report of thumb drives not working anymore)
- You can do a Time Machine Backup on an external drive in order to restore it on your newly installed SSD after it has been formatted (this will also require an Internet connection to access Internet recovery, or a macOS install DVD or thumb drive)
- You can clone your drive on an external one with Carbon Copy Cloner for instance (the 30-day trial has full functionality) in order to clone it back to your new drive once it’s installed
I personally went for the cloning option, which is in my opinion the easiest and fastest method. By the way, you can even do your complete clone a few days before you upgrade your drive. You’ll just have to run it again just before the upgrade, which will copy only the files modified since the last clone.
Cloning your drive with Carbon Copy Cloner
- In the left column, under Source, open the drop-down menu and select your source drive (your MacBook’s internal drive)
- Ensure everything below is checked
- In the right column, under Destination, open the drop-down menu and select your destination drive (a blank external hard drive, a blank partition on an external hard drive or your new SSD directly, if you have a SATA to USB adapter on hand—in this case you will need to initialise the disk first, as explained below)
- Under Handling of data already on the destination, select Delete anything that doesn’t exist on the source
- Click on Clone and wait for it to finish
- Once the clone is done, it’s always useful to check if everything went well by booting off the clone. To do that, reboot while holding the alt (option) key and, once the boot menu pops up, select the clone and hit enter to boot from it
- If everything works as expected, you can continue the tutorial. If you cloned your disk directly to your new SSD, you’ll be done with the tutorial after installing the disk.
Once everything is ready, shut down your MacBook, wait a few minutes for it to cool down if it’s still hot, then flip it over and put it on an antistatic surface.
Removing the back cover
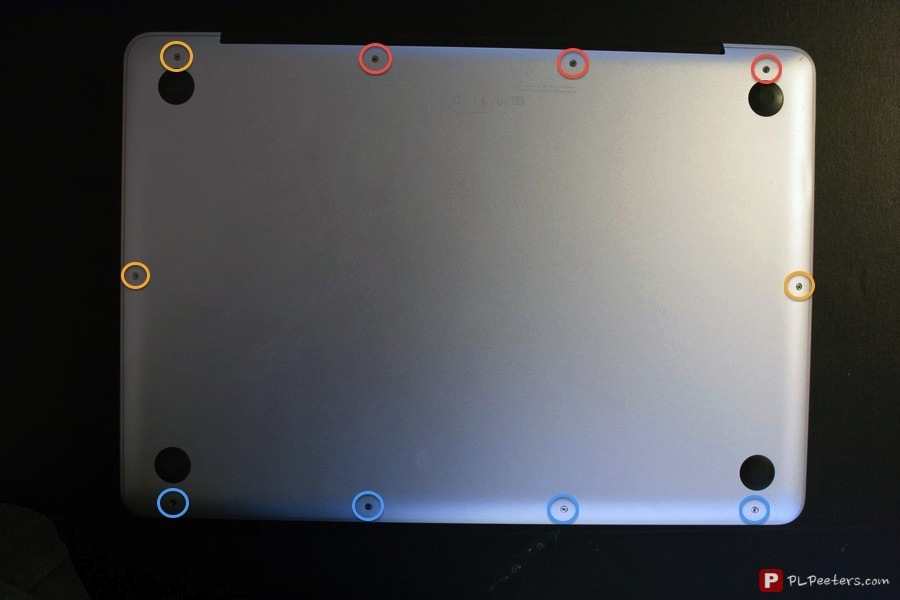
To remove the back cover, you’ll need the Phillips #00 screwdriver. There’s a total of ten screws to remove. Note that all the screws aren’t the same size:
- The three screws in the top right are a little more than a centimetre in length (in red hereunder)
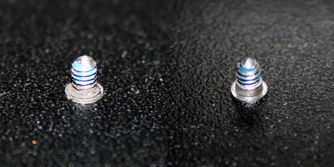
- The other screws are all three millimetres in length but the bottom ones are different from the others (you can see the difference in the picture below)
- The bottom ones are shoulder screws (blue)
- The others are ‘normal’ screws (orange)
So, here we go. Unscrew the ten screws holding the back cover. I suggest putting each screw you remove next to the place it came from, since this seems the simplest way to avoid making a mistake when you put them back. Be careful not to let them fall, since finding them isn’t that easy…
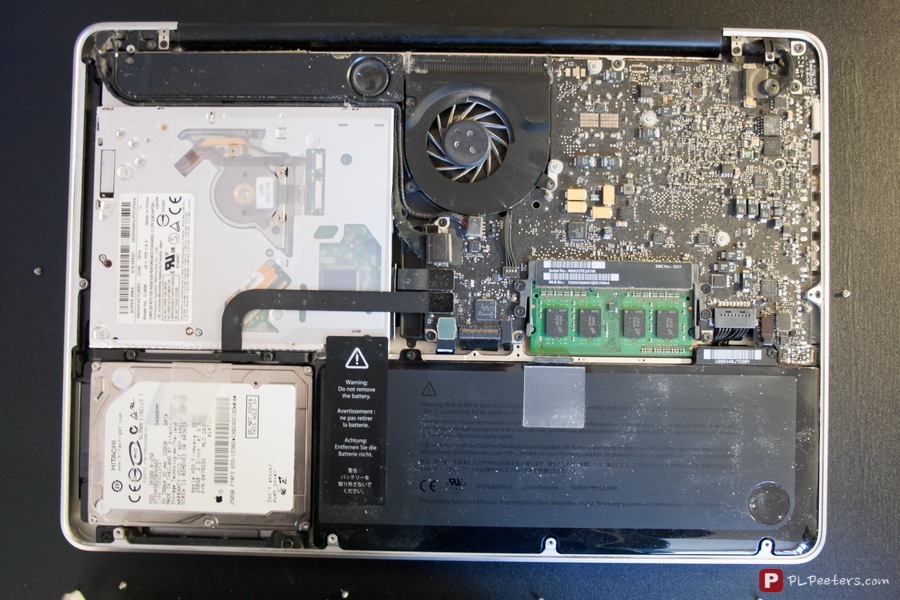
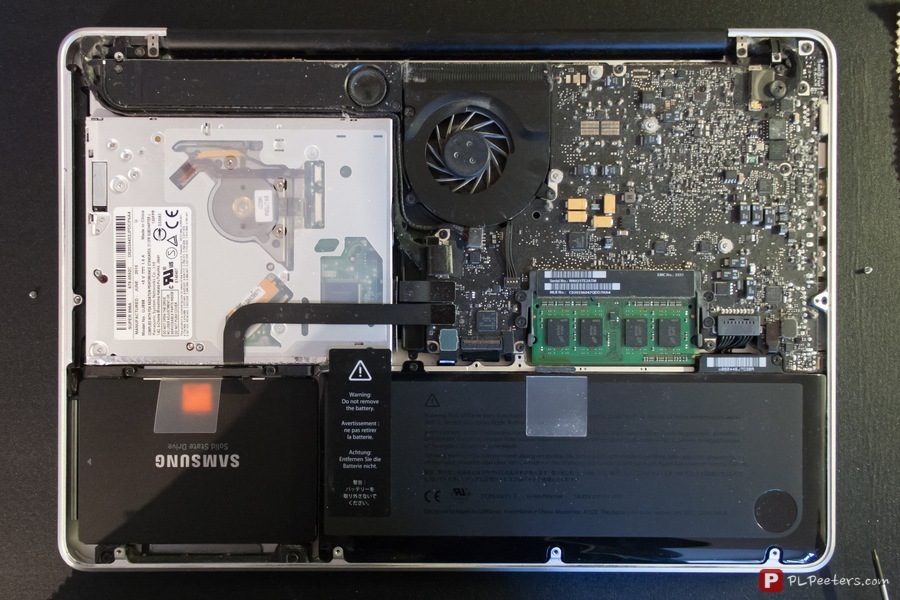
Once all the screws are removed, simply lift the cover to remove it. You are now facing the internals of your MacBook. The part that interests us is obviously the hard drive, located in the bottom left (or the bottom right if your MacBook is a 17-inch). Before you continue, discharge your static electricity by touching a metal surface inside your MacBook (so, not the circuits), which leaves us with the casing of the SuperDrive.
Removing the hard drive
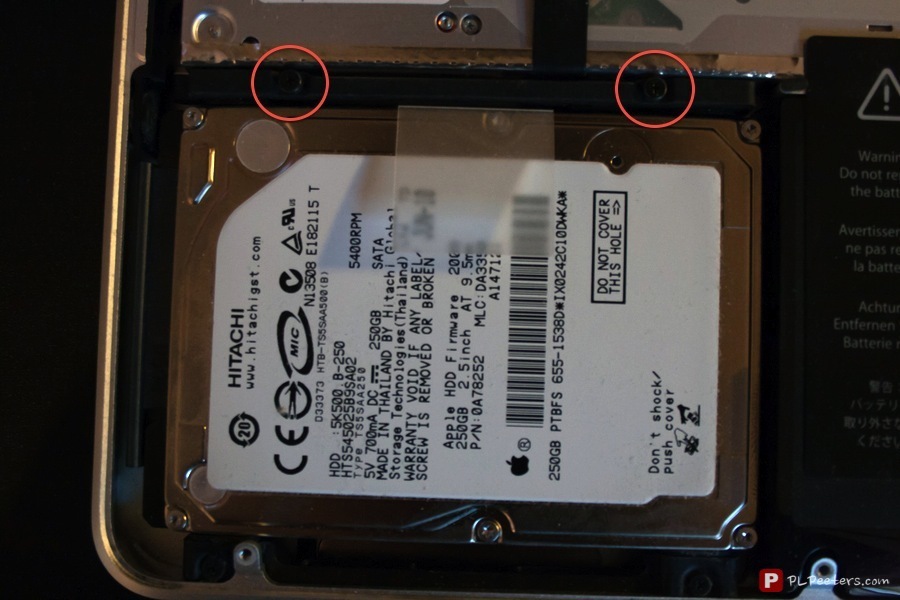
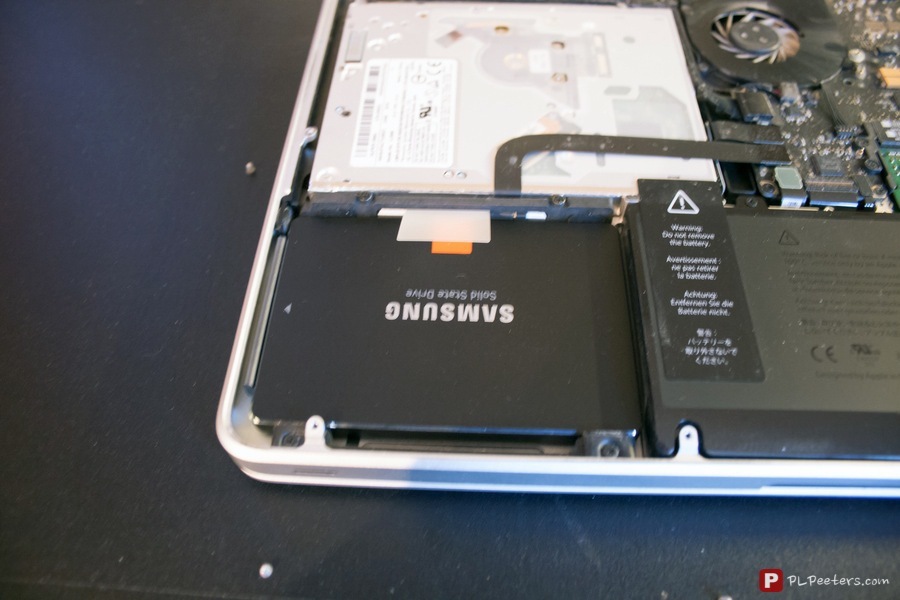
To free the hard drive from its bay, you must remove the two screws located on the retaining bar just above it, circled in red below. Note that these screws remain attached to the bar once unscrewed.
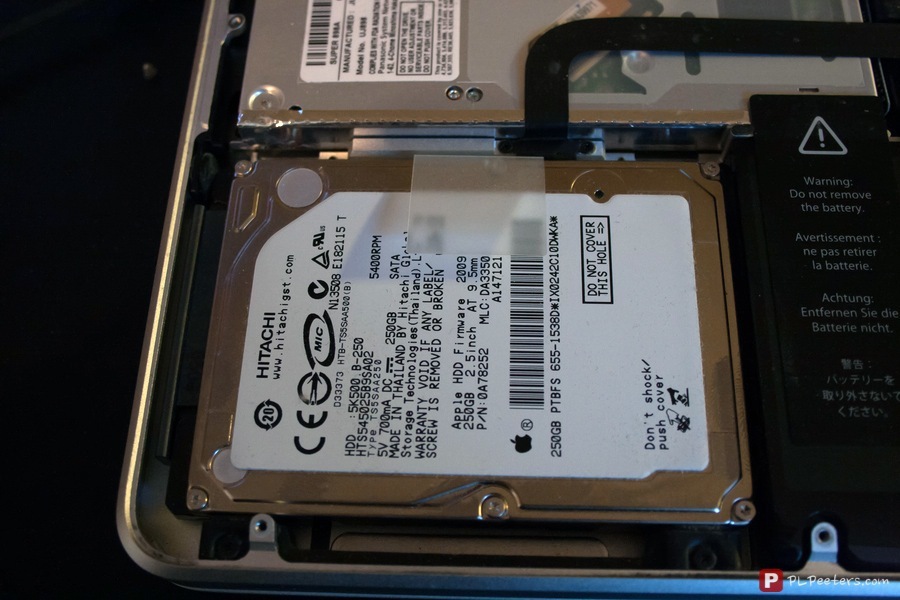
Once the screws are loose, remove the retaining bar and put it aside. Now just pull on the plastic tab to lift your drive up from the bay. This enables you to gently detach the SATA connector that connects your drive to the motherboard. Take care not to damage the SATA cable when you lift your drive or detach the connector. Always handle your hard drive by its sides.
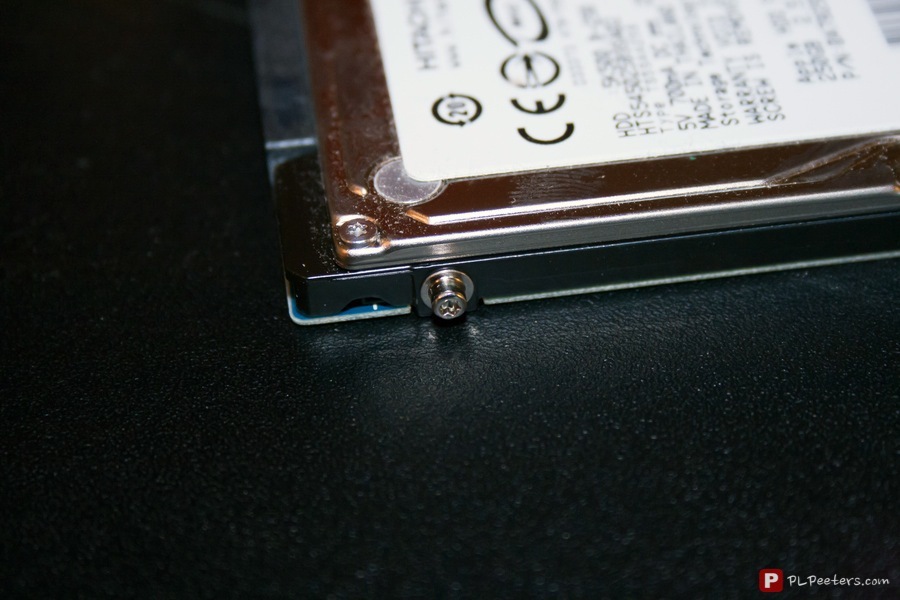
Once the drive is removed, you’ll need your Torx T6 screwdriver to unscrew the four Torx screws located on the sides of the hard drive, unless of course you received some with your new hard drive or it already has some installed.
You guessed it: these four screws are to be mounted on the replacement drive.

Installing the replacement drive
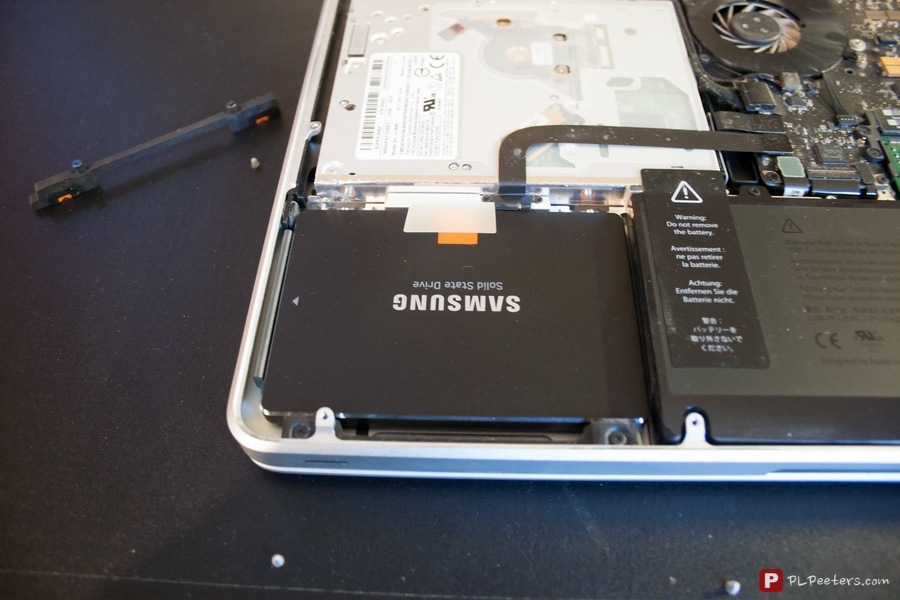
Once all the screws are in place on the new drive, orient it so that the connector is located to your left (or your right if you have a 17-inch MacBook). Now, gently peel the plastic tab off your old drive and stick it on the top side of the new one, just like it was on the old. Connect the SATA connector to the new drive and install it in the hard drive bay.
To install it, you have to put the two bottom screws in the corresponding holes first and then let the others rest where the retaining bar was removed from earlier.
Now that the new drive is installed, put the retaining bar back in place and tighten the screws.
The only thing left to do is putting the cover back. As a reminder, long screws go in the top right holes, shoulder screws in the bottom holes and the others in the remaining ones.
Initialising the drive
To initialise (format) your drive, you’ll have to boot either from your Carbon Copy Cloner clone, an install DVD or thumb drive (from now on, ‘install disk’ refers to these two methods) or boot using Internet recovery. For Carbon Copy Cloner or an install drive/DVD, connect the clone/drive or insert the DVD, then power up your MacBook while holding the alt (option) key. For Internet recovery, hold CMD + R at boot. The next step depends on your chosen installation medium:
- If you went with an install disk or Carbon Copy Cloner, a menu will appear. Select your install disk or clone with the arrow keys and hit enter to boot from it. Your new drive is not recognised at this point; this is absolutely normal.
- If you went with Internet recovery, your Mac will ask you to connect to your network before downloading and booting the recovery tool.
When it is done booting, launch Disk Utility, which you can find in the main menu if you booted from an install disk or Internet recovery, or in /Applications/Utilities/ if you booted on your clone.
Once it’s launched, find your new drive on the left side and click on it. It is normally named with its capacity and size. In my case, it was named ‘250.06 GB Samsung SSD 840 Series Media’. Next, click on Erase at the top, select the APFS format if it is available or the Mac OS Extended (Journaled) format if it is not, give the disk a name (I chose Macintosh SSD to change a little) and click on Erase.
Restoring your data
Now that your drive is initialised, the time has come to restore your data. If you opted for a clean install, launch the macOS installation from your install disk and follow the instructions.
If you opted for a clone, launch Carbon Copy Cloner once you booted off your clone (which should be the case already), then clone the drive to your SSD just like you did before when you cloned your old drive. Once the drive is cloned back, just open up System Preferences, go to Startup and click on your new drive to ensure it is defined as the boot volume.
Reboot, and you’re done. If you have any questions, don’t hesitate to ask them in the comments.

