I get more and more requests along the lines of “I can’t access website xyz, there’s a message telling me it’s blocked. What can I do? Can you show me a similar website?”. There’s one simple permanent solution that can solve this problem once and for all: changing your DNS servers to Google Public DNS.
What DNS servers are for
DNS (Domain Name System) servers are are servers that are used to obtain the IP of a server associated to a hostname. That’s what allows you to type http://www.google.com instead of http://173.194.66.99 in your address bar.
This system is sometimes used by service providers to block access to certain websites. Instead of returning the IP of the website you asked for, the DNS server will return the IP of a server that displays a message telling you access to this website is blocked or forbidden.
Google’s DNS servers have the advantage of not being associated to a particular ISP, so you will never have problems like these. To top it all off, they are often much faster too.
Changing your DNS servers
Here are a few simple steps to update your DNS servers (OS X users, click here).
Windows
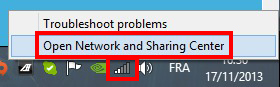
Right-click the icon of your network connection (Wi-Fi or Ethernet) in the taskbar and click on Open Network and Sharing Center.
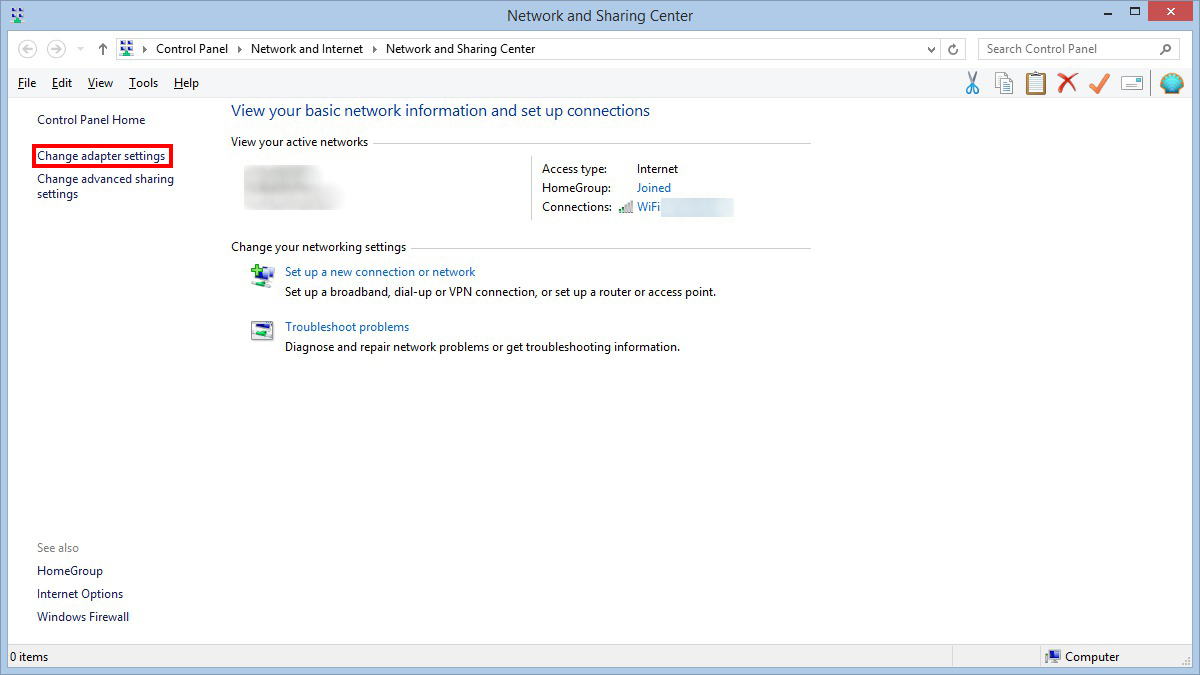
In the left hand column, click on Change adapter settings.
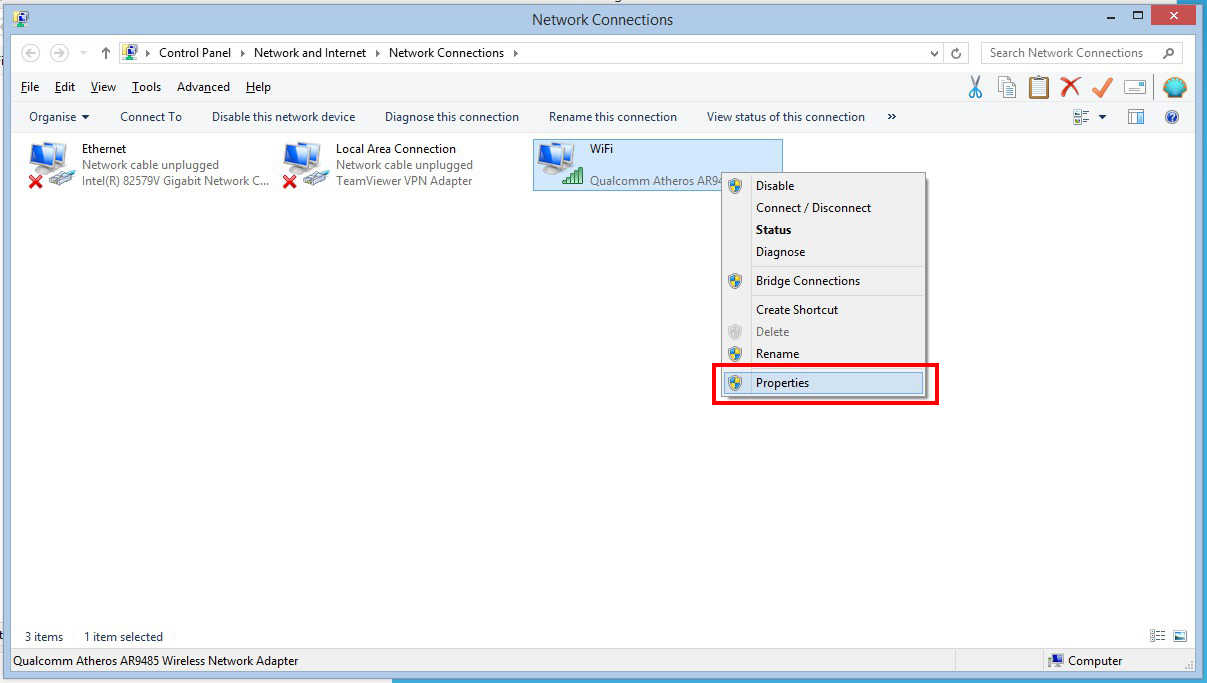
Now, right click the connection you wish to modify and click Properties (you must repeat the following steps for each connection you wish to modify).
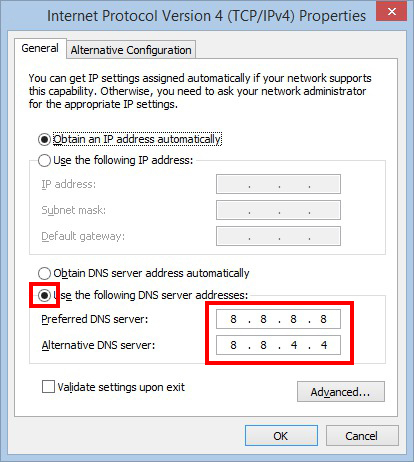
Click on Internet Protocol Version 4 (TCP/IPv4) or Internet Protocol Version 6 (TCP/IPv6), then click Properties.
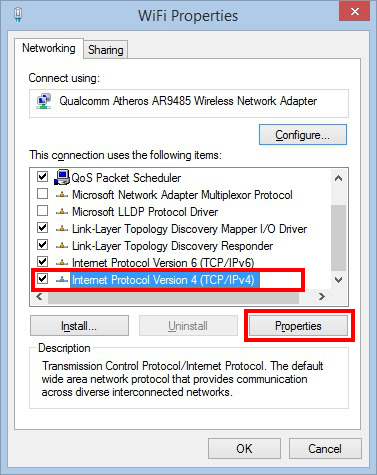
Check the radio button next to Use the following DNS server addresses, then enter 8.8.8.8 as preferred DNS server and 8.8.4.4 as alternative DNS server. If you’re configuring IPv6, the IPs to use are 2001:4860:4860::8888 and 2001:4860:4860::8844.
Click OK as many times as you need to and your problem should be fixed. It’s however possible that you need to empty your DNS cache for it to work. For this, open a command prompt (press Windows + R, then type cmd and hit enter) and type ipconfig /flushdns. If it still doesn’t work, clear your web browser’s cache and everything should be OK.
OS X
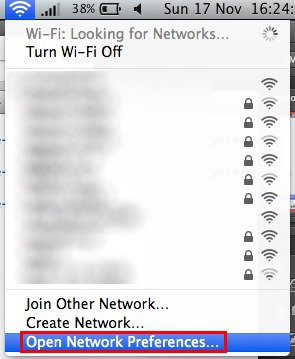
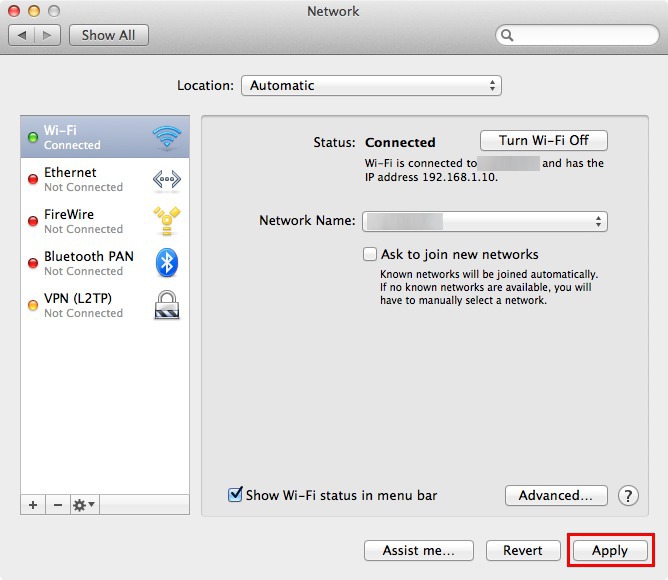
Click on the Wi-Fi or Ethernet icon in the menubar and click on Open Network Preferences.
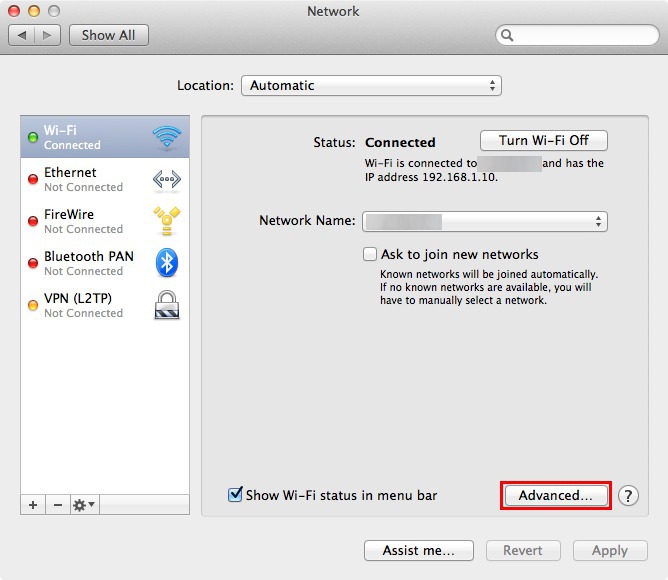
Next, click on the connection you want to change to Google Public DNS in the left hand column and click on Advanced… (you’ll have to repeat the following steps for each connection you wish to modify).
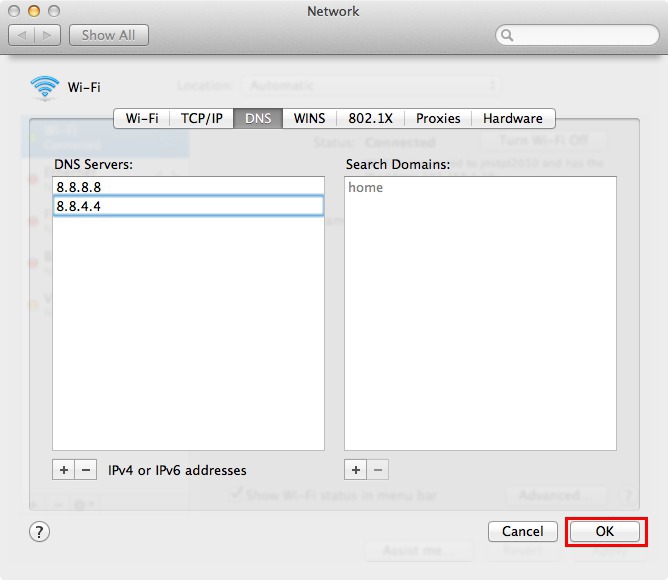
Go to the DNS tab, then add the servers 8.8.8.8 and 8.8.4.4 by clicking on the + in the lower left.
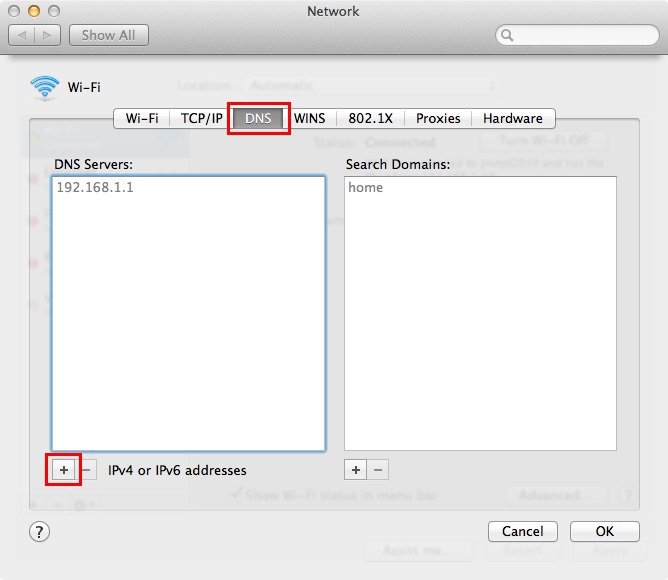
Next, click OK.
Finally, click Apply.
You problem should now be solved. However, it could be possible that you need to empty your DNS cache for it to work. To do this, open a Terminal and type sudo killall -HUP mDNSResponser if you’re using OS X Lion or later, or sudo dscacheutil -flushdns if you’re on an OS X version prior to Lion (as always, enter your password when prompted). If it still doesn’t work, clear your web browser’s cache and everything should be OK.

