Markdown is as wonderful tool I discovered some weeks ago. It enables you to generate HTML from text with a lightweight markup very easily.
One specificity of Markdown is that a Markdown document can be read as is, as opposed to HTML. I’ll walk you through Markdown’s syntax, show you a nice little PHP library for Markdown and finally show you some Markdown editors for different platforms.
Markdown’s Syntax
Links
Syntax for links is quite simple:
[Link to Google](http://www.google.com "Google")
This will generate the following HTML:
<a href="http://www.google.com" title="Google">Link to Google</a>
The title is optional, as always with links.
Titles
For titles, there are multiple options:
Level 1 title
=============

# Another way to write a level 1 title

Level 2 title
-------------

###### Level 6 titles

### You can also put hashes at the end of the title if you like ###
This will generate the following:
<h1>Level 1 title</h1>

<h1>Another way to write a level 1 title</h1>

<h2>Level 2 title</h2>

<h6>Level 6 title</h6>

<h3>You can also put hashes at the end of the title if you like</h3>
Hightlighting text
Highlighting text is also really simple:
Here's some *important* and **very important** text

Here's _another_ syntax for the __same__ thing
The above code generates this:
<p>Here's some <em>important</em> and <strong>very important</strong> text</p>

<p>Here's <em>another</em> syntax for the <strong>same</strong> thing</p>
Code insertion
To insert code, there are a couple of different ways:
`inline code`

    code block
    next line of the code block
The above code will generate this:
<code>inline code</code>

<pre><code>code block
next line of the code block</code></pre>
The second way works by simply indenting your code by 4 spaces (or a tab).
Quotes
To insert quotes, it’s also quite simple. Here’s how it’s done:
> First paragraph of the quote
> Rest of the first paragraph

> Paragraph 2 (same quote)
Here’s the HTML the above code generates:
<blockquote>
<p>First paragraph of the quote. Rest of the first paragraph.</p>
<p>Paragraph 2</p>
</blockquote>
Using Markdown
PHP
Markdown can come in extremely handy to write posts (like this one for instance). It enables you to write in a much more readable way while staying away from those WYSIWYG editors that only rarely do exactly what you want.
On this blog, I use a PHP implementation by Michel Fortin, called PHP Markdown. To convert Markdown to HTML with this library, you just have to include the file phpmarkdown.php in your PHP file and write this $html_content = Markdown($markdown_text). You can find PHP Markdown Extra here. As you can see, there are two versions. The normal version offers support for basic Markdown, and the Extra version adds some functionalities, detailed hereunder.
Specific additions to PHP Markdown Extra
Footnotes
Inserting footnotes is really simple. You just have to put this wherever you’d like the note to appear:
Text that needs a footnote[^1]
Once that’s done, just define the note itself anywhere in the document, like this:
[^1]: Footnote
It will add this in your text:
<sup id="fnref:1"><a href="#fn:1" rel="footnote">1</a></sup>
And this at the end of your document:
<div class="footnotes">
<hr/>
<ol>
<li id="fn:1">
<p>Footnote<a href="#fnref:1" rev="footnote">↩</a></p></li>
</ol>
</div>
As you can see, you can then click on the number to go to the footnote and then click on the arrow to go back to the note inside the text (the ↩ represents this: ↩). It couldn’t be simpler!
Tables
PHP Markdown Extra allows you to create tables easily. Here’s what it looks like:
Title 1 | Title 2 | Title 3  | Title 4
------- | :------ | :------: | ------:
left    | left    | centered | right
line2   | line2   | line2    | line2
This will produce the following code:
<table>
<thead>
<tr>
<th>Title 1 </th>
<th align="left"> Title 2 </th>
<th align="center"> Title 3  </th>
<th align="right"> Title 4</th>
</tr>
</thead>
<tbody>
<tr>
<td>left    </td>
<td align="left"> left    </td>
<td align="center"> centered </td>
<td align="right"> right</td>
</tr>
<tr>
<td>line2   </td>
<td align="left"> line2   </td>
<td align="center"> line2    </td>
<td align="right"> line2</td>
</tr>
</tbody>
</table>
The alignment of cells is determined by the alignment of the colon on the line separating the title from the associated column (centered if it’s on both sides, ragged left if it’s on the left or not present and ragged right if it’s? on the right).
Additional syntax for code blocks
PHP Markdown also allows you to use another syntax for code blocks, which is the following:
~~~
another way for a code block
code
~~~
Using Markdown inside HTML blocks
Markdown normally doesn’t convert what is inside HTML elements representing a block of text (like pre, div, table, p, etc.). With PHP Markdown Extra, you just have to add the attribute markdown=1 to your block for its content to be converted, like this:
<div markdown=1>
Text with **Markdown**
</div>
The markdown=1 will be automatically removed, so the output will be:
<div>
<p>Text with <strong>Markdown</strong></p>
</div>
Assigning an ID or classes to titles or code blocks
If you wish to assign an ID and/or one or more classes to a title, you can put it right behind the title between braces, like this:
# Title with an ID and two classes {#id .class .otherclass}
Which will generate this:
<h1 id="id" class="class otherclass">Title with an ID and two classes</h1>
You can use the same method for code blocks (provided you’re using the tilde method described above), like this:
~~~ {#id .class}
code
~~~
Definitions
You can also create definition lists using PHP Markdown Extra. Here’s the syntax to use: the word to be defined, followed by a colon on the next line and then the definition. Like this:
Website
: A website, also written as Web site, web site, or simply site, is a set of related web pages served from a single web domain.

Apple
: the usually round, red or yellow, edible fruit of a small tree, *Malus sylvestris*,  of the rose family.
Which’ll generate this:
<dl>
<dt>Website</dt>
<dd>A website, also written as Web site, web site, or simply site, is a set of related web pages served from a single web domain.</dd>

<dt>Apple</dt>
<dd>the usually round, red or yellow, edible fruit of a small tree, <em>Malus sylvestris</em>,  of the rose family.</dd>
</dl>
Abbreviations
The last thing PHP Markdown Extra added are abbreviations. You define them as follows:
*[HTML]: HyperText Markup Language
Once that’s done, every single occurence of the defined abbreviation occuring after the definition will be replaced by this:
<abbr title="HyperText Markup Language">HTML</abbr>
Example:
*[HTML]: HyperText Markup Language
HTML is a relatively simple language.
Will become:
<p><abbr title="HyperText Markup Language">HTML</abbr> is a relatively simple language.</p>
Markdown editors
Mac OS X
I personally use an editor called Mou. It’s a really simple editor, but it’s beautiful and functional. It colors your Markdown input and generates the output live. The output will scroll down or up whenever you scroll inside the Markdown. Here’s a screenshot of this post being written in Mou:
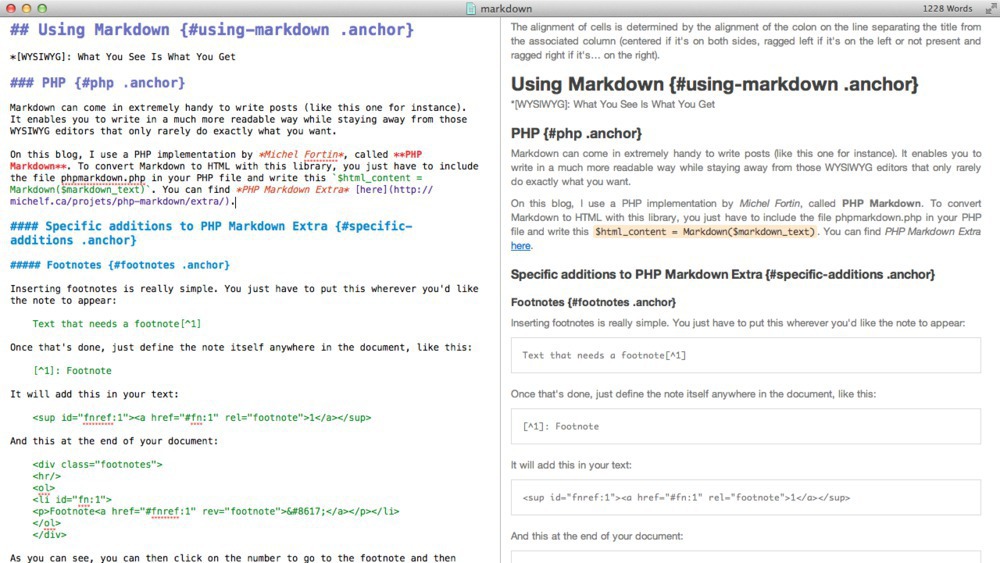
If you wish, you can edit the stylesheet it uses to format the output. By the way, Mou supports the syntax for footnotes and tables used by PHP Markdown Extra.
It can export your Markdown documents to PDF or HTML.
To download Mou, click here.
Windows
For Windows, I suggest using MarkdownPad. Like Mou, it displays a live preview and colors your Markdown. Unfortunately, the preview is only a preview of the visible Markdown, so you can’t scroll in the ouput. However, it’ll always be a preview of what you have in the left side of the window. Here’s a screenshot of the app:
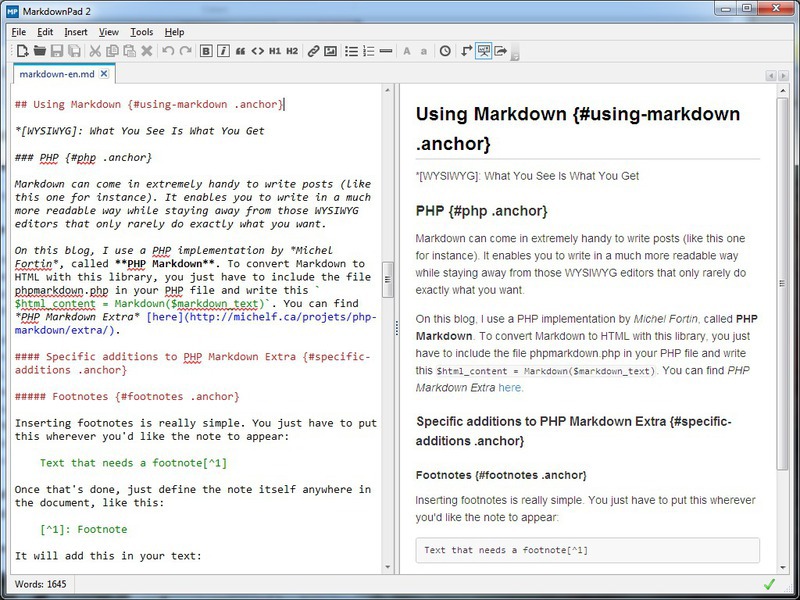
It also allows you to edit the stylesheets used to format the output. Unlike others, it only supports the standard Markdown (you have to buy the pro version to get support for Extra).
Concerning exportation, you can export to ?
To download MarkdownPad, click here.
Linux
For Linux users, I suggest using ReText. Just like the two others, it also colors your output and generates a live preview. Unfortunately, ReText doesn’t make the output scroll with the input, like Mou does. Here’s a screenshot:
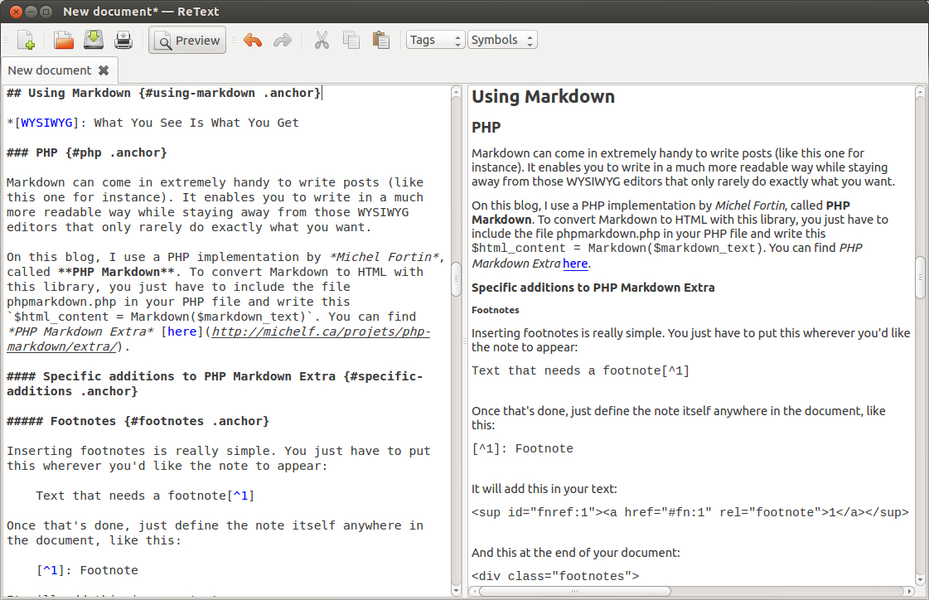
This editor can export your output as an ODT, HTML, PDF or TXT file.
Ubuntu
If you’re using Ubuntu, just open a Terminal and type the following commands to install ReText:
sudo add-apt-repository ppa:mitya57
sudo apt-get update
sudo apt-get install retext
If you wish to have a two-column layout with a live preview on the right like the two other editors, just launch ReText, go to the Edit menu and click on Live preview.
Other distributions
You’ll first have to install a Python package called Python-Markdown using the command below:
pip install markdown
Once this is done, download ReText here, open your Terminal in the download folder and enter these commands:
tar -xvf ReText-4.0.0.tar.gz # The name of this file can vary
cd ReText-4.0.0 # The name of this directory can also vary
sudo python setup.py install
If you wish to have a two-column layout with a live preview on the right like the two other editors, just launch ReText, go to the Edit menu and click on Live preview.

